Tuesday, October 13, 2009

Problem with Wifi Connection with Wifi3

I has been trying to use my backtrack3 to connect to my wifi connection but i failed to do so as there are some problem with the WPA supplicant thingy.
and i heard that there the problem is solved in Backtrack4.
I will start downloading Backtrack 4 and try to make a Bootable BT4 Thumbdrive.
^.^

Monday, September 21, 2009

Installing Backtrack3 client in USB thumbdrive with persistent Changes

I was planning to start learning security knowledge using Backtrack, However, by using a live CD, the changes I made will always gone on the next boot while VMWare image methods gives me problems in accessing my hardwares.

To solve the problem, my menthor, Mr. Muslim has suggested me to boot an installation of Backtrack from a USB thumbdrive. And thank you Mr. Muslim, it is a very good solution to it. After googling for a moment, i found a very useful resource here which guides me through the installation. Thank you so much Infosec Ramblings.

I am currently using windows XP. Thus, the guide here will mostly based on a perspective of a Windows XP user. However, users of others OS will find this guide useful too.


First step: Partition the USB FlashDrive.
In my case, I used a 8GB thumdrive for this purpose.

The first step of all is to partition your thumb drive into the format as follows:
  1. First Partition: at least 1GB in FAT32 format.
  2. Second Partition: the rest of thumbdrive capacity in ext2 format.
You may use a linux machine to repartition the thumbdrive. However, if you don't have one, I would like to recommend you to use the live CD named GParted where everthing is in a very user-friendly.Just spend some time with it and i am sure you will be able to master it. GParted can be downloaded here.


Second step: Download the USB image.

To download the USB image of Backtrack 3, click here. Alternatively, you may go to the download page of Remote-Exploit http://www.remote-exploit.org/backtrack_download.html and browse for the image file.


Third step: Extract the folders

In this step, you will need to copy the /bt3 and /boot directory into the first partition of the target thumbdrive (the FAT32 Partition).
*note: if you are a Windows user, the ext2 partition is invisible under "My Computer".

To copy the file from the image file, you may either mount the image file as a virtual CDROM to copy it. Or in my case, use 7-Zip to view the image and copy the files.


Fourth step: Make the Thumbdrive bootable

In windows XP:
  1. Open the command windows. (by enter "cmd" inside the RUN panel under Start Menu).
  2. Change to drive letter of the thumbdrive.
  3. go to the boot directory. Command:
    cd /boot
  4. execute bootinst.bat. Command:
    bootinst.bat

Now, the thumbdrive should be able to boot. Now you may restart the machine and try to boot the thumbdrive.
*note: Remember to modify the BIOS setting accordingly to enable booting from USB devices.


Fifth Step: Identify Thumbdrive device name.


Now, boot up backtrack3 from the thumbdrive. For the options, i would recommend you to use the "Backtrack 3 with KDE" option.

Inside Backtrack3, open the konsole. (it's just beside the KDE Menu Button)
type in the command
fdisk -l

and you will get something like this:
Disk /dev/sda: 250.0 GB, 250059350016 bytes
255 heads, 63 sectors/track, 30401 cylinders
Units = cylinders of 16065 * 512 = 8225280 bytes

Device Boot Start End Blocks Id System
/dev/sda1 * 1 6527 52428096 7 HPFS/NTFS
/dev/sda2 6528 19594 104960677+ 7 HPFS/NTFS
/dev/sda3 19595 30401 86807227+ 7 HPFS/NTFS

Disk /dev/sdb: 8019 MB, 8019509248 bytes
255 heads, 63 sectors/track, 974 cylinders
Units = cylinders of 16065 * 512 = 8225280 bytes

Device Boot Start End Blocks Id System
/dev/sdb1 * 1 131 1052226 b W95 FAT32
/dev/sdb2 132 974 6771397+ 83 Linux


now, identify the name of the thumbdrive. A tips to it is that the thumbdrive will have 2 partition with the first parttion with system "W95 FAT32" while the second one having system of "Linux". Another method is through the Device capacity. In the example above, my device name is sdb and the partitions are sdb1 and sdb2.


sixth step: Persistent Changes

In this step, we will make use of the partition name obtained in step 5.
  1. Open Konsole.
  2. Navigate to the path of 2nd Partition of the thumbdrive. For example, if the partition name is sdb2, we will use the command below:
    cd /mnt/sdb2
  3. Create a folder named "changes" at the root path of the partition. Command
    mkdir changes

  4. Navigate to "syslinux" folder. Command:
    cd /boot/syslinux

  5. Obtain Access control of the files. Command:
    chmod +Xx lilo
    chmod +Xx syslinux
  6. Open syslinux.cfg for editing.Command:
    kedit syslinux.cfg
  7. copy the following lines to the line next to the line "
    DEFAULT /boot/vesamenu.c32"
    LABEL MyBT3
    MENU LABEL My Backtrack3
    KERNEL /boot/vmlinuz
    APPEND vga=0x317 initrd=/boot/initrd.gz ramdisk_size=6666 root=/dev/ram0 rw changes=/dev/
    sdb2 autoexec=xconf;kdm

    LABEL MyBT3Konsole
    MENU LABEL My Backtrack3 Konsole
    KERNEL /boot/vmlinuz
    APPEND vga=0x317 initrd=/boot/initrd.gz ramdisk_size=6666 root=/dev/ram0 rw changes=/dev/
    sdb2
  8. Change the partition named as highlighted above to the 2nd Partition name of your thumbdrive as obtained from Fifth Step. Save the file and exit.
Now, reboot your machine and choose the boot options create above. Try to make changes to the OS (for example, create a new folder on the desktop) and reboot the OS. If the folder still there after you reboot your machine, you have done it succesfully.
*note: the options will be shown as "My Backtrack3" under the boot menu.

Thursday, January 17, 2008

installing video players in FC8 (Xine Player,real player and vlc player)

To install video players in your FC8 machine, i recommend you to install real player and vlc player and Xine Player.
  1. Real player to playback real media files
  2. VLC player as MPEG, DVD, and DivX player
  3. Xine Player which we can install the Binary Codecs to support the formats that Xine does not directly support
Installing Real Player:
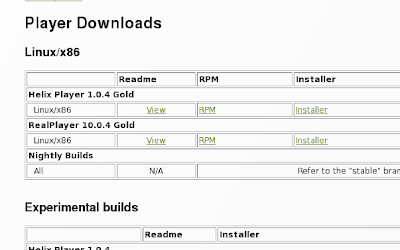
First, go to https://player.helixcommunity.org/2004/downloads/ and download the rpm package from the Linux/x86 section.
Then go to terminal windows and enter the following commands:
install compat-libstdc++-33 compatibility libraries:
$ sudo yum install compat-libstdc++-33

then, cd to the directory where you save the real-player RPM and enter the command
$ sudo rpm -ivh [filename]

in my case, i entered
$ sudo rpm -ivh RealPlayer-10.0.4.750-20050401.i586.rpm

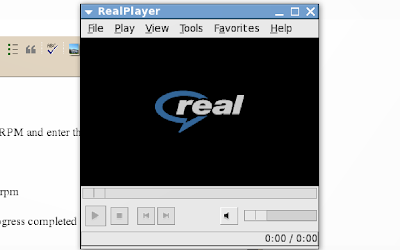
After the rpm is succesfully installed, the installation progress completed and your real player is ready to be used.

Installing vlc Player:

installing vlc player is very easy.
just enter the following command in terminal and wait, your vlc player will be ready upon the completion of the command.
$sudo yum -y install vlc

Installing Xine Player:

Firstly, install the Xine Player by using the following command

$ sudo yum install xine xine-lib-extras xine-lib-extras-nonfree libdvdcss

Then, enter the following instrcutions and wait for the download to be completed.
$ sudo wget http://www.mplayerhq.hu/MPlayer/releases/codecs/all-20071007.tar.bz2

after the download is completed, enter the following instructions into the terminal
$ sudo mkdir -p /usr/lib/codecs
$ sudo tar -jxvf all-20071007.tar.bz2 --strip-components 1 -C /usr/lib/codecs/

Your Xine Player is now ready to be used.

Note: the all-20071007.tar.bz2 in tar -jxvf all-20071007.tar.bz2 --strip-components 1 -C /usr/lib/codecs/ is the filename of the binary codec you downloaded. Sometimes, the filename will be saved a little differently with the filename stated. Please use ls command to check whether the filename is matched.

Installing audio player that supports MP3 in Fedora Core 8 - Amarok

The MP3 player that i recommend in Fedora Core 8 is Amarok. The reason i recommend Amarok is because its support various types of audio format including MP3 and it is easy to be installed.

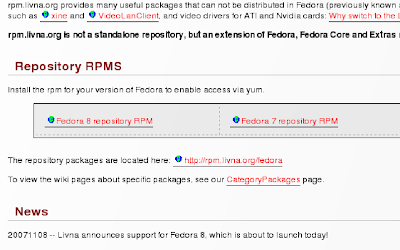
Before you start to install Amarok, you have to install livna repository first.
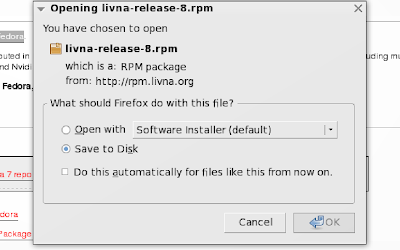
To install livna repository, go to http://rpm.livna.org/rlowiki/ and click on the "Fedora 8 repository RPM".
A download windows will pop up and choose the "Save to Disk" option.
Go to terminal and cd to the directory you saved the livna RPM file in just now.
use the following command to install livna.
# rpm -ivh [filename]
for my case, my command is
# rpm -ivh livna-release-8.rpm


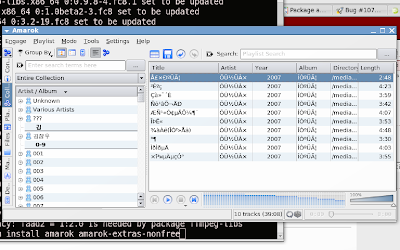
Now, you may proceed to install amarok with the additional features enabled.
in the terminal, enter
# yum -y install amarok amarok-extras-nonfree
your amarok player will be ready to be used.


Notes:
- before you run the installation, please use su command to gain root privileges
- livna repository has to be installed before installing amarok player so that you will be able to install amarok-extras-nonfree

Sunday, January 13, 2008

Installing nVidia and ATI cards in Fedora by using kmods from Livna

Just a while ago,my friend, bob from fedoraforum.org, introduced me a better way of installing graphic card drivers that is by installing kmods from Livna. By using driver from nvidia, the process of installing graphic card driver has to be redo once there is kernel change. However, if we use kmods from Livna, we don't need to do so.

Here's some very nice and useful articles that bob introduced me:
Getting nVidia cards to work in Fedora
Getting ATI cards to work in Fedora


special thanks to:
bob @ fedoraforum.org
Steward Adam || Firewing1

Compiz-fusion not showing title bars (problem solved)

After installing compiz-fusion in my fedora machine, there is a serious problem occuring.
I found that my windows are shown without title bars and i couldn't switch between programs.

somehow, it can be fixed by disable the desktop effects and enable back the desktop effects or you can also simply run the compiz-icon to fix the problem.

However, running compiz-icon every time you log in is a tiring job and i bet you won't like it.
So, This is the way to make the process automated.

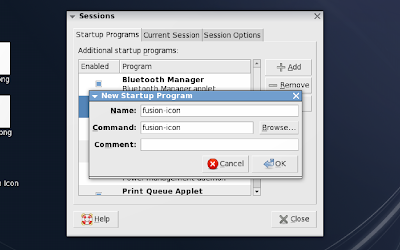
System > Preferences > Sessions >> Startup Programs > add

key in the values
Name: fusion-icon
Command: fusion-icon

then click OK and close the windows.

Try to restart the windows and i guess the problem is solved.

Installing Compiz Fusion in Fedora Core 8

Before you install compiz-fusion in fedora core 8, please make sure that you have your graphic card driver installed.
you can make sure that your fc8 does have direct rendering enabled using the command below:
glxinfo | grep direct
if your direct rendering is running, you will get a result as showned below:
[root@localhost ~]# glxinfo | grep direct direct rendering: Yes


In order to install compiz-fusion, these are the commands that you need to enter into your teminal:
$ su
# wget http://www.dfm.uninsubria.it/compiz/fusion/compiz-fusion.repo -O /etc/yum.repos.d/compiz-fusion.repo
# yum install compiz-all fusion-icon-all compiz-fusion-plugins-unsupported compiz-bcop ccsm emerald-themes

after yum have finished installing the p rogram into your machine, you have to enable the desktop effects:
System > Preferences > Look and Feel > Desktop Effects >> Enable Destop Effects

In some cases, you will get an error message says that cannot enable desktop effects.
in this case, you may try to do this:

$su
#gedit /etc/X11/xorg.conf

you will get the xorg.conf at gedit. now, trace the section shown in screenshot below:
In the section "Module", add a line Load "extmod"
for example:

Now, save and close the file.
Now, try to enable the desktop effects again.
If you are able to enable the desktop effects, your installation is completed.

However, if you are not able to enable the desktop effect, you may try to enter the following command into your teminal.
compiz --replace

That's all, wish you will be able to install compiz-fusion in your fedora. Have fun.


Here's some link that you might be interested in
http://forums.fedoraforum.org/forum/showthread.php?t=171130
Compiz not showing title bars
 
Tracked by ClickAider